This post may contain affiliate links, please read my full disclosure policy for more details.
In this video tutorial, I’m going to show you how to single crochet into back bump when working on your crochet projects. Some people may also refer to this as crocheting in the third loop.
This is a great technique for someone who is looking to learn a new skill whether they are a complete beginner or an experienced crafter. I personally love it and will be including it more in my free patterns.
So if you are looking for different ways to add a nice decorative touch to your handmade items then this crochet tutorial is for you!
Scroll down to watch the video.
What is the difference between back bump and back loop crochet?
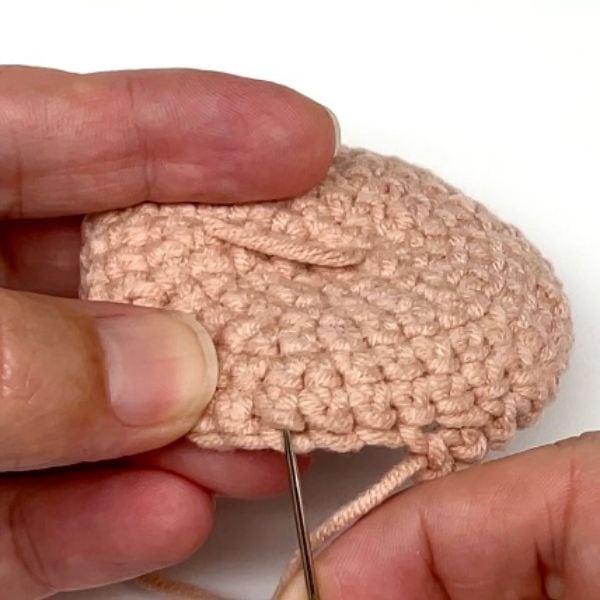
When you follow your crochet patterns you may be asked to crochet in front loops or back loops of the stitches. This is not to be mistaken for back bumps (third loops) which are the little bumps on the very back of your single crochet stitches.
Front and back loops form the top of the stitch which looks like the letter ‘V’. Have a closer look at the photo below. You will see I am inserting my crochet hook into the bump which is behind the ‘V’.

Tips on how to single crochet into back bump
Before you get started I would like to share some handy tips that you may find helpful when using this back bump technique. Trust me, they will save you lots of frustration. 🙂
Crochet your latest round or row loosely
When working on your latest round or row make sure to work your stitches loosely. And this is especially important for someone who is a tight crocheter. If your stitches are loose you will find it much easier to insert your hook into the back bumps.

Use a smaller crochet hook
If you struggle to insert your crochet hook into the back bumps then I would recommend using a smaller hook. Swapping your hook for one that is one size smaller will make a big difference.
To complete the rest of your project, you can go back to using the larger crochet hook once you are done with crocheting into the back bumps.
Finished look of your projects
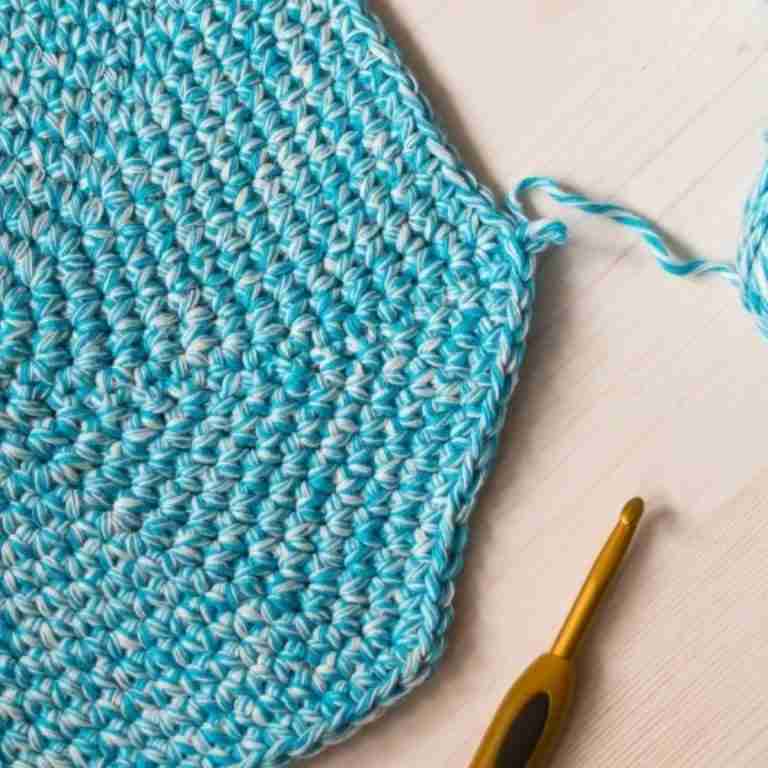
By crocheting into the back bumps you will create a row of V-shaped horizontal stitches which are in fact the tops of the stitches from the previous round or row. They will look similar to surface crochet stitches.
And if you are not sure what surface stitches are then you can learn more about them in this video tutorial.
Why crochet in the back bump when working on Amigurumi?
You may wonder why to use this technique while working on your Amigurumi projects. Well, I believe there are many ways to incorporate this method into your work.
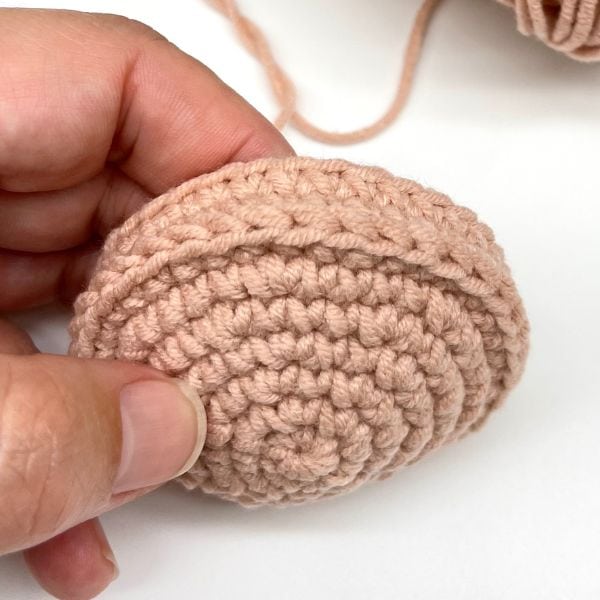
For example, you can achieve a neat bottom edge when working on the arms or legs of your crochet animals. Or you can create a neat looking edge when crocheting a jumper or a cap for your crochet toy. I have always believed that it’s the small details that count! 🙂
Watch the video tutorial
Watch this stitch tutorial that will show you step by step how to single crochet into back bump when working on your crochet projects. I have included both right handed and left handed versions for you.
And don’t forget to subscribe to my YouTube channel to receive an update every time I publish a new video.
Right handed

Left handed

Join our Cuddly Stitches Community Facebook group to share your creations, chat to fellow Amigurumi makers or to exchange tips and tricks. You can also share feedback and ask for support when working with my patterns.
Did You Find this Tutorial Helpful?
- Leave a comment: share your feedback with us in the comment box below
- Pin this tutorial: pin this tutorial on Pinterest so you can return to it later
- Share this tutorial: show me your love and link to this tutorial on social media
- Subscribe: subscribe to my Newsletter to receive news and updates when I publish new patterns and video tutorials
- Join my Mystery Crochet Along: crochet a mystery Amigurumi toy along with other fellow crocheters for a lot of fun with a ‘surprise’ twist. Sign up for free!
- Explore more: visit my Amigurumi tutorials for more tips and tricks you will love!
Get a 15% discount on all PDF patterns!
Sign up and get a discount on all current and future patterns from my Etsy shop. Plus receive regular updates on latest patterns and video tutorials.
Explore More of My Amigurumi Tutorials
Discover my Amigurumi basics video tutorials, perfect if you want to learn new skills and techniques. Whether you need help with a particular pattern or just looking for helpful tips and tricks, these tutorials are just the thing for you!
Find the Perfect Crochet Pattern!
Create beautiful crochet toys with my collection of free Amigurumi crochet patterns. From easy patterns for beginners to more advanced designs, there is something for everyone to enjoy!
Here are just a few patterns you may love. Why don’t you give them a try?!
Free crochet bunny lovey pattern
Happy crocheting!