
This post may contain affiliate links, please read my full disclosure policy for more details.
This free crochet bunny lovey pattern is my first crochet lovey blanket I have ever designed and I must say I really really enjoyed it. Once you finish the first few rounds of the blanket, you can just completely ‘swith off your brain’ and just get on with it! Seriously relaxing! 🙂

It was also my first time working with the Lion Brand Coboo yarn and I am really happy I went for the natural cotton/bamboo blend. As a result the Amigurumi bunny lovey is super soft and cuddly, which is what you are after when you crochet for a baby. 🙂
Free PDF Pattern!
Crochet this cute bunny rattle to go with your crochet bunny lovey – sign up for my newsletter and receive the free PDF pattern straight into your inbox!

Free Crochet Bunny Lovey Pattern – Notes
Skill level: basic/intermediate crochet skills and knowledge
Finished size – blanket: 30.5cm (12 inches) x 30.5cm (12 inches)
Finished size – bunny height: 14cm (5.5 inches)
Free Crochet Bunny Lovey Pattern – Materials and Equipment
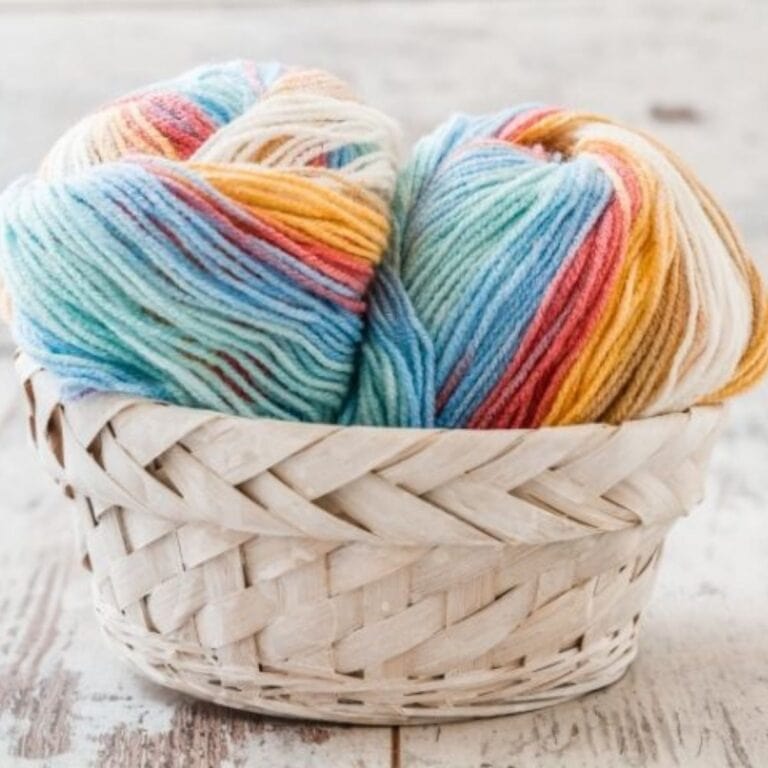
Yarn I used for this free crochet bunny lovey pattern:
– Light worsted #3 = DK/8 ply
– 51% cotton and 49% bamboo blend
– 1x ball of pink yarn – Coboo Lion Brand – colour 101 – (100g/212m)
– 1x ball of white yarn – Coboo Lion Brand – colour 100 – (100g/212m)
I love using the cotton and bamboo blend for this pattern as it makes the bunny lovey blanket super soft and cuddly. You can purchase the Coboo Lion Brand yarn from Lion Brand in US and LoveCrafts in UK.
Or just simply use any 100% cotton that will work just as well. You can also use 100% acrylic if you prefer to work with this type of yarn. Have a read of my Best yarn for Amigurumi crochet tutorial to find out more about what types of yarn are the best for making crochet toys.
Other materials used: polyester fibre fill, a long piece of black thread yarn for eye embroidery
Crochet hook: I used 3mm = C/2, if using different weight of yarn then refer to hook size recommendations on the yarn but go one size smaller. I highly recommend this ergonomic crochet hook set from Amazon as it comes in a stylish case and with other accessories such as stitch markers etc.
Other equipment used: scissors, yarn needle, pins with large heads, stitch marker or thin yarn to use instead
Choking hazard warning: the use of safety eyes or buttons poses a choking risk for children under the age of 3 therefore I recommend using embroidery instead.

Grab this Free PDF Pattern – Crochet Bunny Rattle
Sign up for my newsletter and receive the free pattern straight into your inbox.
Free Crochet Bunny Lovey Pattern – Abbreviations Used
This free crochet bunny lovey pattern is written using US crochet terminology
– MR: magic ring
– ST: stitch
– SC: single crochet stitch
– HDC: half double crochet stitch
– DC: double crochet stitch
– TC: triple crochet stitch
– CH: chain
– STR CH: starting chain
– CR SP: corner space
– SL ST: slip stitch
– INC: increase = two single crochet stitches in the same stitch
– L INC: large increase = three single crochet stitches in the same stitch
– DEC: standard decrease
– INV DEC: invisible decrease = insert the hook into the front loop of the first stitch (two loops on hook) and immediately insert it again into the front loop of the next stitch (three loops on the hook). Yarn over and draw through the first two loops on the hook (two loops on the hook). Yarn over and draw through the two loops on the hook to finish your invisible decrease.
– BLO: back loops only
– FO: fasten off
– (…..) x 6: repeat the pattern inside the brackets by the given number (in this example, repeat the pattern in the brackets 6 times)
– {…}: number shown inside these brackets equals the number of total stitches at the end of each round
Mix and Match Your Crochet Lovey
Do you like this free crochet bunny lovey pattern but would like to mix and match the bunny with a different blanket? Then you can explore my crochet comforter patterns and pick from these adorable blankets:
Get a 15% discount on all PDF patterns!
Sign up and get a discount on all current and future patterns from my Etsy shop. Plus receive regular updates on latest patterns and video tutorials.
Free Crochet Bunny Lovey Pattern – Let’s Get Started!
You may find these Amigurumi tutorials handy before you get started with this free crochet bunny lovey pattern. And don’t forget to watch my step by step video tutorials for extra help with my patterns.
To view the free online pattern, please continue to scroll down. You can also download the ad-free and printable version of this pattern for a small fee from my Etsy shop. Your generous contribution will help towards the cost of materials and running this website so I can continue to publish my free online patterns for everyone to enjoy.
Join our Cuddly Stitches Community Facebook group to share your creations, chat to fellow Amigurumi makers or to exchange tips and tricks. You can also share feedback and ask for support when working with my patterns.
Take advantage of this AMAZING OFFER…open an Etsy shop and list your first 40 items for FREE!

How to Crochet the Ears
Crochet from the top of the ear downwards.
R1: MR – 6 x SC into the ring {6} – watch this step by step video tutorial on How to crochet a magic ring for Amigurumi
R2: (SC in next ST, INC) x 3 {9}
R3: SC in each ST around {9}
R4: SC in next ST, INC, (SC in next 2 ST, INC) x 2, SC in next ST {12}
R5: (SC in next 3 ST, INC) x 3 {15}
R6: SC in next 2 ST, INC, (SC in next 4 ST, INC) x 2, SC in next 2 ST {18}
R7: (SC in next 5 ST, INC) x 3 {21}
R8-R13 (6 rounds): SC in each ST around {21}
R14: (SC in next 5 ST, INV DEC) x 3 {18} – watch this step by step video tutorial on How to crochet an invisible decrease for Amigurumi
R15-R16 (2 rounds): SC in each ST around {18}
R17: SC in next 2 ST, INV DEC, (SC in next 4 ST, INV DEC) x 2, SC in next 2 ST {15}
R18: SC in each ST around {15}
R19: (SC in next 3 ST, INV DEC) x 3 {12}
R20: SC in each ST around {12}
Do not stuff, FO leaving a long piece of yarn for sewing.
Fold the bottom of each ear in half and sew it together before attaching the ears to the head.

How to Crochet the Head
Crochet a ball.
R1: MR – 6 x SC into the ring {6}
R2: INC in each ST around {12}
R3: (SC in next ST, INC) x 6 {18}
R4: SC in next ST, INC, (SC in next 2 ST, INC) x 5, SC in next ST {24}
R5: (SC in next 3 ST, INC) x 6 {30}
R6: SC in next 2 ST, INC, (SC in next 4 ST, INC) x 5, SC in next 2 ST {36}
R7: (SC in next 5 ST, INC) x 6 {42}
R8: SC in next 3 ST, INC, (SC in next 6 ST, INC) x 5, SC in next 3 ST {48}
R9: (SC in next 7 ST, INC) x 6 {54}
R10: SC in next 4 ST, INC, (SC in next 8 ST, INC) x 5, SC in next 4 ST {60}
R11-R20 (10 rounds): SC in each ST around {60}
R21: SC in next 4 ST, INV DEC, (SC in next 8 ST, INV DEC) x 5, SC in next 4 ST {54}
R22: (SC in next 7 ST, INV DEC) x 6 {48}
R23: SC in next 3 ST, INV DEC, (SC in next 6 ST, INV DEC) x 5, SC in next 3 ST {42}
R24: (SC in next 5 ST, INV DEC) x 6 {36}
Start stuffing the head and keep stuffing as you go along.
R25: SC in next 2 ST, INV DEC, (SC in next 4 ST, INV DEC) x 5, SC in next 2 ST {30}
R26: (SC in next 3 ST, INV DEC) x 6 {24}
R27: SC in next ST, INV DEC, (SC in next 2 ST, INV DEC) x 5, SC in next ST {18}
R28: (SC in next ST, INV DEC) x 6 {12}
R29: SC in each ST around {12}
Stuff well, FO closing the hole using a yarn needle – watch this step by step video tutorial on How to close a hole in an Amigurumi piece

How to Crochet the Arms
Crochet from the bottom of the arm upwards.
R1: Magic ring – 6 x SC into the ring {6}
R2: INC in each ST around {12}
R3: (SC in next ST, INC) x 6 {18}
R4: SC in next ST, INC, (SC in next 2 ST, INC) x 5, SC in next ST {24}
R5: (SC in next 7 ST, INC) x 3 {27}
R6-R7 (2 rounds): SC in each ST around {27}
Change yarn to pink colour.
R8: SC in each ST around {27}
R9: (SC in next 7 ST, INV DEC) x 3 {24}
R10: SC in each ST around {24}
R11: SC in next ST, INV DEC, (SC in next 2 ST, INV DEC) x 5, SC in next ST {18}
Start stuffing the arm.
R12-R13 (2 rounds): SC in each ST around {18}
R14: SC in next 2 ST, INV DEC, (SC in next 4 ST, INV DEC) x 2, SC in next 2 ST {15}
R15: SC in each ST around {15}
R16: INV DEC, SC in next 13 ST {14}
Stop stuffing the arm.
R17: SC in each ST around {14}
R18: INV DEC, SC in next 12 ST {13}
R19: SC in each ST around {13}
R20: INV DEC, SC in next 11 ST {12}
R21-R23 (3 rounds): SC in each ST around {12}
R24: SC the opening together to close the arm – watch this step by step video tutorial on How to close a hole in a flat Amigurumi piece
FO leaving a long piece of yarn for sewing.
Grab this Free PDF Pattern – Crochet Bunny Rattle
Sign up for my newsletter and receive the free pattern straight into your inbox.
How to Crochet the Blanket
Crochet the blanket as a square starting from the middle.
I have written the first few rounds without using abbreviations so it is easier for you to follow the pattern.
Watch this step by step video tutorial on How to start a square crochet lovey blanket
R1: Magic ring – chain 5 (the first 3 chains in this starting chain count as a double crochet stitch and the remaining 2 chains will create a corner space), 3x double crochet into the magic ring, chain 2, 3x double crochet into the magic ring, chain 2, 3x double crochet into the magic ring, chain 2, 2x double crochet into the magic ring, slip stitch into 3rd chain of the starting chain (Pic B3 & B4) {20 including the slip stitch}

R2: Chain 5 (the first 3 chains in this starting chain count as a double crochet stitch and the remaining 2 chains will create a new corner space), 1x double crochet into the first corner space you created in R1 (Pic B5 & B6), double crochet into next 3 stitches, 1x double crochet into the second corner space you created in R1, chain 2, 1x double crochet into the second corner space again, double crochet into next 3 stitches, 1x double crochet into the third corner space you created in R1, chain 2, 1x double crochet into the third corner space again, double crochet into next 3 stitches, 1x double crochet into the last corner space you created in R1, chain 2, 1x double crochet into the last corner space again, double crochet into next 3 stitches, slip stitch into 3rd chain of the starting chain {28 including the slip stitch}

R3: Slip stitch into next stitch (Pic B9 & B10), chain 5 (the first 3 chains in this starting chain count as a double crochet stitch and the remaining 2 chains will create a new corner space), 2x double crochet into the first corner space you created in R2, double crochet into next 5 stitches, 2x double crochet into the second corner space you created in R2, chain 2, 2x double crochet into the second corner space again, double crochet into next 5 stitches, 2x double crochet into the third corner space you created in R2, chain 2, 2x double crochet into the third corner space again, double crochet into next 5 stitches, 2x double crochet into the last corner space you created in R2, chain 2, 2x double crochet into the last corner space again, double crochet into next 6 stitches, slip stitch into 3rd chain of the starting chain {44 including the slip stitch}

R4: Slip stitch into next stitch, chain 5 (the first 3 chains in this starting chain count as a double crochet stitch and the remaining 2 chains will create a new corner space), 2x double crochet into the first corner space you created in R3, double crochet into next 9 stitches, 2x double crochet into the second corner space you created in R3, chain 2, 2x double crochet into the second corner space again, double crochet into next 9 stitches, 2x double crochet into the third corner space you created in R3, chain 2, 2x double crochet into the third corner space again, double crochet into next 9 stitches, 2x double crochet into the last corner space you created in R3, chain 2, 2x double crochet into the last corner space again, double crochet into next 10 stitches, slip stitch into 3rd chain of the starting chain {60 including the slip stitch}
I will now use abbreviations from R5 onwards so please refer to the list of abbreviations at the top of this page.
R5: SL ST into next ST, CH 5, (2x DC into CR SP, DC in next 13 ST, 2x DC into CR SP, CH 2) x 3, 2x DC into CR SP, DC in next 14 ST, SL ST into 3rd CH of STR CH {76 incl SL ST}
R6: SL ST into next ST, CH 5, (2x DC into CR SP, DC in next 17 ST, 2x DC into CR SP, CH 2) x 3, 2x DC into CR SP, DC in next 18 ST, SL ST into 3rd CH of STR CH {92 incl SL ST}
R7: SL ST into next ST, CH 5, (2x DC into CR SP, DC in next 21 ST, 2x DC into CR SP, CH 2) x 3, 2x DC into CR SP, DC in next 22 ST, SL ST into 3rd CH of STR CH {108 incl SL ST}
R8: SL ST into next ST, CH 5, (2x DC into CR SP, DC in next 25 ST, 2x DC into CR SP, CH 2) x 3, 2x DC into CR SP, DC in next 26 ST, SL ST into 3rd CH of STR CH {124 incl SL ST}
R9: SL ST into next ST, CH 5, (2x DC into CR SP, DC in next 29 ST, 2x DC into CR SP, CH 2) x 3, 2x DC into CR SP, DC in next 30 ST, SL ST into 3rd CH of STR CH {140 incl SL ST}
R10: SL ST into next ST, CH 5, (2x DC into CR SP, DC in next 33 ST, 2x DC into CR SP, CH 2) x 3, 2x DC into CR SP, DC in next 34 ST, SL ST into 3rd CH of STR CH {156 incl SL ST}
R11: SL ST into next ST, CH 5, (2x DC into CR SP, DC in next 37 ST, 2x DC into CR SP, CH 2) x 3, 2x DC into CR SP, DC in next 38 ST, change yarn to white colour and SL ST into 3rd CH of STR CH {172 incl SL ST}
R12: SL ST into next ST, CH 5, (2x DC into CR SP, DC in next 41 ST, 2x DC into CR SP, CH 2) x 3, 2x DC into CR SP, DC in next 42 ST, change yarn to pink colour and SL ST into 3rd CH of STR CH {188 incl SL ST}
R13: SL ST into next ST, CH 5, (2x DC into CR SP, DC in next 45 ST, 2x DC into CR SP, CH 2) x 3, 2x DC into CR SP, DC in next 46 ST, change yarn to white colour and SL ST into 3rd CH of STR CH {204 incl SL ST}
R14: SL ST into next ST, CH 5, (2x DC into CR SP, DC in next 49 ST, 2x DC into CR SP, CH 2) x 3, 2x DC into CR SP, DC in next 50 ST, SL ST into 3rd CH of STR CH {220 incl SL ST}
R15: SL ST into next ST, CH 5, (2x DC into CR SP, DC in next 53 ST, 2x DC into CR SP, CH 2) x 3, 2x DC into CR SP, DC in next 54 ST, change yarn to pink colour and SL ST into 3rd CH of STR CH {236 incl SL ST}
R16: SL ST into next ST, CH 5, (2x DC into CR SP, DC in next 57 ST, 2x DC into CR SP, CH 2) x 3, 2x DC into CR SP, DC in next 58 ST, change yarn to white colour and SL ST into 3rd CH of STR CH {252 incl SL ST}
R17: SL ST into next ST, CH 5, (2x DC into CR SP, DC in next 61 ST, 2x DC into CR SP, CH 2) x 3, 2x DC into CR SP, DC in next 62 ST, SL ST into 3rd CH of STR CH {268 incl SL ST}
R18: SL ST into next ST, CH 5, (2x DC into CR SP, DC in next 65 ST, 2x DC into CR SP, CH 2) x 3, 2x DC into CR SP, DC in next 66 ST, SL ST into 3rd CH of STR CH {284 incl SL ST}
R19: SL ST into next ST, CH 5, (2x DC into CR SP, DC in next 69 ST, 2x DC into CR SP, CH 2) x 3, 2x DC into CR SP, DC in next 70 ST, change yarn to pink colour and SL ST into 3rd CH of STR CH {300 incl SL ST}
R20: SL ST into next ST, CH 2, 2x HDC into CR SP, (HDC in next ST, SC in next 71 ST, HDC in next ST, 4x HDC into CR SP) x 3, HDC in next ST, SC in next 71 ST, HDC in next ST, skip the last stitch and HDC into CR SP instead and SL ST into 2nd CH of STR CH {308 incl SL ST}
FO and weave the yarn ends in.
Free PDF Pattern!
Crochet this cute bunny rattle to go with your crochet bunny lovey – sign up for my newsletter and receive the free PDF pattern straight into your inbox!
Free Crochet Bunny Lovey Pattern – Assembly
Ears: Pin the ears to the head making sure they look symmetrical from the front, side and back. Sew the ears to the head. I placed the ears between R4 and R6 of the head, however you can attach them as per your preference.
Eye and nose embroidery: Embroider the eyes using a long piece of black thread yarn as shown in the photo below. I embroidered the eyes between R13 and R15 leaving 7 stitches in between the eyes.
Watch this video tutorial on How to embroider eyes on Amigurumi. The eyes in the video are slightly different but the technique is the same.
To embroider the nose, use the same white yarn you used for the blanket. I embroidered the nose between R16 and R20.

Attaching the head to the blanket: Before attaching the head to the blanket, chose which way you would like the bunny to face. I like to attach the head diagonally so the bunny is facing one of the corners. Preferably you want the corner, where you connected the rounds, to be behind the bunny.
It is important that the head is attached to the blanket firmly and securely as the baby the lovey is intended for is likely to pull on the head or the blanket often. I sew the head to the blanket following a pattern of 3 circles (Pic A1). This way the lovey can’t be pulled apart and the head will be nice and steady instead of being wobbly.
But don’t worry too much if you are finding it difficult to follow the assembly instructions below. You can attach the head the way you prefer. You can sew it together around 2 circles or even in a cross and one circle.

First circle: Thread your yarn needle with the yarn tail you were left with after finishing the head. Pull the needle through all the stitches in the centre of the blanket’s magic ring (Pic A2). Then go back into the head through the centre of the closing circle.
Second circle: Using the same yarn tail you used for the first circle, sew R28 of the head to the top part of the double crochet stitches in R1 of the blanket. There are 12 stitches in R28 and 12 double crochet stitches in R1 of the blanket so the stitches should telly up. If you continue to sew in a circle always going through the top part of the double crochet stitches (skipping the corner spaces), you will be left with a neat finish.
Third circle: Still using the same yarn tail you used for the first two circles, sew R26 of the head to the top part of the double crochet stitches in R2 of the blanket. There are 24 stitches in R26 and 20 double crochet stitches in R2 of the blanket so you can skip one stitch in R26 every time you come to the corner space in R2. Once you have completed the full circle, weave the yarn tail in.
Arms: Pin the arms to the blanket right by the side of the head and sew them securely. Weave the yarn tails in.
You have now finished your lovey blanket. And if you enjoyed the easy assembly then you will love these patterns:
Did You Enjoy Making this Crochet Bunny Security Blanket?
- Leave a comment: share your feedback with us in the comment box below
- Pin this pattern: pin this pattern on Pinterest so you can return to it later
- Share your photos: I love to see your finished crochet toys so please share your photos on social media with the tag @cuddlystitchescraft
- Share this pattern: show me your love and link to this pattern on social media
- Subscribe: subscribe to my Newsletter to receive news and updates when I publish new patterns and video tutorials
- Join my Mystery Crochet Along: crochet a mystery Amigurumi toy along with other fellow crocheters for a lot of fun with a ‘surprise’ twist. Sign up for free!
- Explore more: visit my free Amigurumi crochet patterns for more crochet toys you will love!
Explore More of My Free Amigurumi Crochet Patterns
If you like this free crochet bunny lovey pattern, you may also love these patterns. Why don’t you give them a try?!
Free crochet bunny rattle pattern
Free crochet giraffe lovey pattern
Free crochet dinosaur pattern
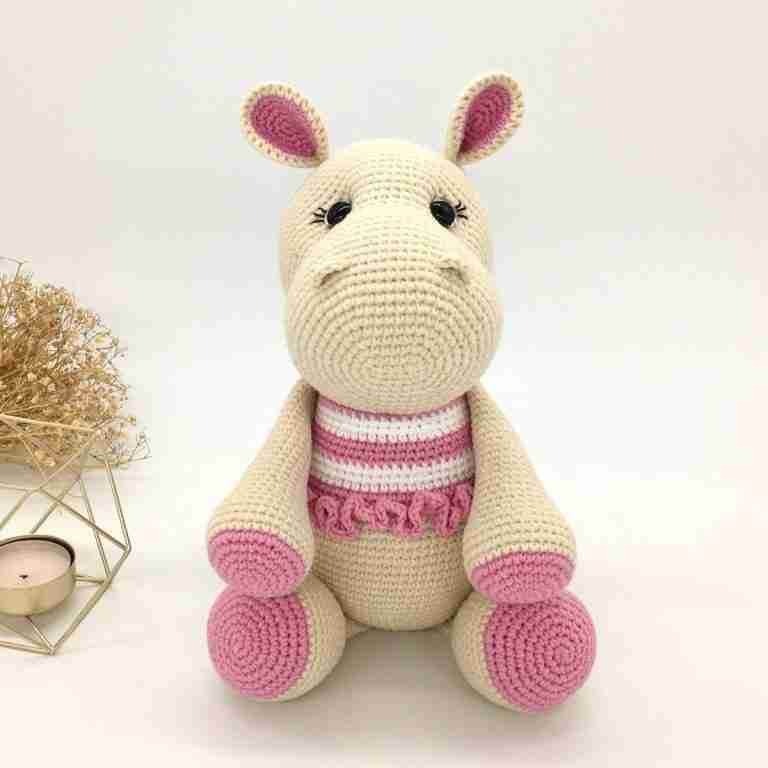
Free crochet hippo lovey pattern
Or browse through my collection of crochet lovey and rattle patterns and make something special for your baby. Or surprise your friends and family with a beautiful baby gift!
Happy crocheting!
Get a 15% discount on all PDF patterns!
Sign up and get a discount on all current and future patterns from my Etsy shop. Plus receive regular updates on latest patterns and video tutorials.


Hi! I just wanted to say how adorable your bunny pattern is—I’m a beginner at crocheting, and I chose this as a special project for my first granddaughter, so it means a lot to me. Everything has been going really well and I’m so happy with how it’s coming together!
I did run into a small issue with the head, though—it turned out quite a bit larger than expected and doesn’t seem as proportional to the body as in the photos. I tried twice, taking it apart and crocheting again to understand where I might have gone wrong, but it still came out big. I even consulted with a friend who’s an avid crocheter, and she also felt that the head seems too large.
I’m not sure if I may have misunderstood something in the pattern or if there’s a tip you could share to help adjust it.
Thank you so much for creating and sharing such a lovely design—I really appreciate any guidance you might have!
Hi Tat, so happy to hear that you like my bunny pattern and that you chose it for your first granddaughter! 🙂 The size of the head will depend on the type of yarn you are using. If you are using a much thicker yarn than what’s stated in the pattern it will be larger. But, you can always use the pattern for the head of the matching bunny rattle. That rattle head is smaller so hopefully it will suit you better. Here is the link for the rattle pattern: https://www.cuddlystitchescraft.com/sleepy-bunny-free-crochet-rattle-pattern/
Have you already started on the arms? Are they also too large?
Love,
Petra x
Hi Petra! Thank you so much for the prompt response—I really appreciate it! 🙂
I’m using medium weight 4 Lion Brand 100% acrylic yarn with a 3.5 mm hook. My crocheting is on the looser side, but overall I’m really happy with how everything is turning out—it’s just the head that visually feels a bit too large compared to your photos.
The arms and ears look great and seem proportional next to the blanket portion of the bunny, so that’s why the head stood out to me. I’ll definitely take a look at the rattle pattern you suggested—thank you for that tip!
Thanks again for your help! 💛
You are very welcome Tat! 🙂 Yes, worsted #4 is thicker than the yarn I used and if you tension is slightly lose then all this combined together would mean that the head would be a bit larger. But the rattle pattern should definitely help as the rattle head is smaller. 🙂
Love,
Petra x
Adorable! Featured your bunny lovey pattern on Crafts on Display today, I hope you enjoy it. This is the perfect way to spend a cozy night on the couch!
Thank you so so much Violeta for sharing my pattern on your blog, it’s much appreciated! 🙂
Love,
Petra x
Hello, I started making the blanket and I’m not sure I understand the “slst into next stitch” at the beginning of each round, do you mean slip stitch into the next chain? Like the 4th chain? The holes in the corner spaces look really big when I compare it to your blanket (especially the first one of the round), I tried a 3.5mm hook but it still looks off, I’m wondering if I’m doing something wrong ! I’m also using DK cotton yarn. Thank you!
Hi Sarah, yes the slip stitch will be in the next chain. Here is a video tutorial showing you how to start the blanket. https://www.cuddlystitchescraft.com/square-crochet-lovey-blanket/
And yes, the first corner space will be a bit bigger than the other corners but if it’s too big it may be because your chains at the beginning of the round are too large possible because of your tension. You could try chaining 4 instead of 5 at the beginning of each round which will make the corner space smaller.
I hope this helps but please let me know if you need more help.
Love,
Petra x
Thank you so much, I didn’t know you had a video for it. I’ll try to fix my tension or do one less chain !
And thank you for sharing your lovely patterns.
Hi Sarah, I usually include the link to my video tutorials inside the pattern so it should be there somewhere (I hope!) 🙂
And you are very welcome, happy you like my patterns! 🙂
Love,
Petra x
Making this right now for a coworkers first baby girl! I’m mixing the bunny head with the 8 point blanket from your Hippo! First time making a blanket like this and I’m loving how this is turning out 💜 Will post a picture when I’m done!
Perfect, really happy to hear that you are pleased with how the lovey is turning out. 🙂 I can’t wait to see the finished bunny. You can post the photo in our FC group if you wish.
Love,
Petra x
Hi, I am curently making this and i was wondering about the placements of the ears. How far from each other shuld they be and wich way shuld the ears face?
Hi Guddis, no problem at all, happy to help. I placed the ears between R4 and R6 of the head. But to be honest, there is no hard rule, where to place them. Just pin them to the head first where you think they look the best and if you are happy with the look, then just sew them on. Also, when you fold the bottom of the ear in half and sew it with a couple of stitches, this will create a little ‘dip’ in the ear so the ‘dip’ should face forward.
I hope this helps but please let me know if you have more questions.
Love,
Petra x
Another thought—-is the free pattern all the pages on this site? I guess I was looking for a more concise form—without the “extra” verbiage. I also have trouble downloading from the Etsy site-so I don’t want to go there for this pattern.
Hi Susan, the free pattern is only available online on my website. The pattern PDF is available as a downloadable pattern for a small fee. If you have a trouble downloading from Etsy, you can also purchase it from my Ravelry store.
As for the extra text, the pdf pattern includes all the info on materials, equipment, abbreviations and the actual pattern. It’s a bit less than on the website but it includes a lot more photos.
Love,
Petra x
Absolutely love your patterns. I have used mixed yarn from 100% cotton to acrylic. My clients love them. Most importantly the kids love them as well.
Thank you so much and I’m happy everyone likes them! 🙂
Love,
Petra x
Hi,
I actually found your video. And found out the problem. I think I was misreading the pattern up top.
Thank you,
Roxanne
Hi Roxanne, no worries at all. I’m glad you were able to find the video tutorial and figured out where the problem was. 🙂
Love,
Petra x
Hi my blanket is quite stiff, unlike the one shown in the image, do you have any advice on how to make it soft and floppy.
Hi Zoe, that might be because you are using too small a hook with the type of yarn you are using. Or your tension is too tight. What type of yarn and what size of hook are you using?
Love,
Petra x
i’m using 8 ply acrylic and 3mm hook
OK, then I would recommend using a 4mm hook and see if that helps. 🙂
Love, Petra x
I am very new to crochet and this is one of my first projects. My question is about the color change. I have never done a color change in any of my projects before so this is a new technique for me. I looked in your tutorial videos, but didn’t see one on color change, so I found a few tutorials on YouTube. They mentioned different methods of color changing and I came across one that involved a floating stitch. There was another video that recommended fastening off and then introducing the new color. Which of these Options do you recommend for this pattern? Is there a specific way that you recommend doing color changes for this pattern and if so, is there a way to describe this or make a video to demonstrate this? Thank you so much.
Hi Anna, thank you for your message. Unfortunately I don’t have a video tutorial on colour changes yet but if I were to pick between the two methods you mentioned I would go for fasten off and then introducing the new colour. I would recommend invisible fasten off though and I have a video tutorial on this here: https://www.cuddlystitchescraft.com/crochet-fasten-off-invisible-finish/
Hope this helps but please let me know if you have more questions.
Love,
Petra x
hello, I love what you’re doing with the site… please don’t close it off, you’re really helpful to the poor people who doesn’t have money to buy patterns. keep up the good work ma’am. I’m from Nigeria and I’m starting out crochet business. I would love to start with the amigurumi. I hope I have your blessings to sell the outcome of your pattern after I crochet them. thank you in anticipation to your response.
Hi Mariam, thank you so much for your lovely comment and don’t you worry, I don’t have any plans to close my blog down haha :-)). You are more than welcome to sell the toys you made using my patterns as long as you credit me as the original designer and please if you could include a link to my website that would be great! 🙂
I wish you good luck with your crochet business! 🙂
Love, Petra x
hola yo hice una compra pero no sé cuánto tardan en enviarme mi pedido,encargué para hacer el conejito con mantita en toda y blanca me podrías decir muchas gracias ,hermosos los trabajos besos
Hi Ana Maria, did you purchase the pattern on Etsy? You can access your purchases in your Etsy account and download the pattern from there. Please note this doesn’t work on the Etsy app so you need to access your account on laptop or on the Internet browser on your phone. If you are still having issues, please send me a message on Etsy. Thank you.
Love,
Petra x
Thanks for the pattern! It’s lovely! I was wondering before you attach everything if you need to block it? Or is this not necessary?
Hi Annelie, thank you for your comment. I am happy you like the pattern. It is entirely up to you if you want to block the blanket or not. But I don’t think it is neccessary since the baby or child will be playing with it anyway. If it is a gift then it might be a good idea to block it so it looks perfect but otherwise I don’t think it’s needed. But as I said, totally up to you. But if you do decide to block, then yes do it before you attach everything else.
Love, Petra x
ik ga er volgende week mee beginnen. mijn vriendin word in dec oma. Ben heel benieuwd of het lukt. kan het ook met de gewone katoen bol van 50 gram. en moet ik het haaknaald nummer aanhouden wat er dan op mijn katoen staat. zodra het gelukt is, zal ik een foto plaatsen.
dankjewel alvast
groetjes marielle
Hi Marielle,
Yes you can work on this using regular cotton and I would recommend a hook size which is one size smaller than the one on the yarn label. For the blanket you can either go one size smaller or you can use the recommended hook size but the blanket will be a bit bigger.
Love, Petra x
Hello Petra,
Thank you for this pattern
So lovely!
Just curious, do you think it would work with chenille yarn?
Thanks
Anmol 🙂
Hi Anmol,
Thank you and you are very welcome! 🙂 I have seen some of my followers making the bunny lovey with chenille yarn and it looked lovely. It will just be bigger than the size described in the pattern.
Love,
Petra x
I’m a new crocheter so I really appreciate all the instruction and videos! I’m assuming that I should SC the increases in row 2 of the arms. Is that right?
Hi Michele, thank you for your comment. I am really pleased you like my instructions and videos. 🙂 And yes, the INC = 2 x SC into the same stitch 🙂
Love, Petra x
hi! This is so cute! do you know if the color name for Coboo Yarn is actually pink or Mauve? I feel like it looks closer to mauve than pink? I love the one that you made, and was hoping to recreate.
Hi Saby, thank you so much. The colour shade of the yarn I used is Pink colour code 101 or sometimes 101A. Mauve is a different shade (colour code 145/145L)and is darker.
I hope this helps but please let me know if you have more questions.
Love, Petra x
I love this pattern- it makes a very cute piece… but you lost me on the blanket portion, since your adding 2 dc to each corner on each row your pattern jumps 3, 5, 9, 13… but that’s not what it say if your reading the instructions. I even double checked the stitches were correct with your photo of where to mount the head. I’m surprised no one else has caught this before. 🤷🏼♀️
Hi DH,
Thank you for your comment and your feedback. 🙂 I think you may be seeing a discrepancy because in R2 you should be only adding 1xDC, CH2, 1xDC in the corners. And from R3 onwards, it is 2xDC, CH2, 2xDC in each corner.
I have checked the pattern and all counts look correct.
If you still believe there is an error in the pattern, could you please clarify in more detail where you are seeing it?
Thank you.
Love, Petra x
Absolutely love the bunny lovey pattern. Thank you so much 💓
Hi Claire, thank you so much for your lovely comment and you are more than welcome! 🙂 I am happy you like the bunny lovey pattern!
Love, Petra x
Thank you for sharing your beautiful art.
Hi Laura, thank you so much for your lovely comment. And you are more than welcome!
Love, Petra 🙂