This post may contain affiliate links, please read my full disclosure policy for more details.
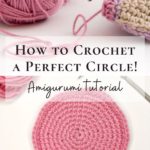
There are three different ways to make a single crochet spiral circle but only one method shows you how to crochet a perfect circle! If you want to find out which method it is then keep on reading. 🙂
Crocheting a flat circle may seem like a pretty basic project to learn so why is it so important? Well, if you have read my ‘What is Amigurumi? And why you will love it!’ tutorial then you will know that crochet circle forms the basis of the Amigurumi technique you will be using to make your adorable crochet toys.
Traditionally you can make crochet circles using basic single, half double or double crochet stitches while joining each round with a slip stitch to form a complete circle. However, to make your Amigurumis, you will need to crochet your circles in spiral using a single crochet stitch only.

Abbreviations Used
This pattern is written using US crochet terminology
MR: magic ring
ST: stitch
SC: single crochet stitch
INC: increase = two single crochet stitches in the same stitch
(…..) x 6: repeat the pattern inside the brackets six times
(…..) x 5: repeat the pattern inside the brackets five times
{…}: number shown inside these brackets equals the number of total stitches at the end of each round
Materials and Equipment
Yarn I used:
– Fine Sport #2 = 4 ply
– 55% cotton and 45% acrylic
– pink yarn – YarnArt Jeans – colour 36 – (50g/160m)
I like to purchase my YarnArt Jeans from Amazon or from Etsy. But you can use any 100% cotton yarn as it will work just as well.
If you would like to check some great substitutes for YarnArt Jeans then have a read of my Best Yarn for Amigurumi Crochet tutorial. You can find the substitutes towards the end of the article.
Crochet hook: I used 3mm = C/2, if using different weight of yarn then refer to hook size recommendations on the yarn but go one size smaller. I highly recommend this ergonomic crochet hook set from Amazon as it comes in a stylish case and with other accessories such as stitch markers etc.
Other equipment used: scissors, yarn needle, stitch marker or thin yarn to use instead

How to Crochet a Perfect Circle – The Basics
When crocheting a circle in Amigurumi, you will start your first round with a magic ring and 6 x single crochet stitches. You will then continue to crochet in spiral while increasing 6 times in each round. Keeping a count of your stitches and increases is very important, which is why I highly recommend to use a stitch marker every single time.
If your crochet circle ends up looking ‘wavy’ or misshapen this means that you have increased too many times. On the other hand, if your circle ‘curls up’ into a bowl then you have missed an increase somewhere. In both cases, you will need to go through your work round by round to check where the mistake occurred so you can correct it.
As mentioned earlier I am going to show you 3 different methods how to crochet a circle for your Amigurumi projects. I have included 10 rounds in each pattern but you can of course continue crocheting in spiral for as many rounds as you wish. Just follow the same technique and don’t forget to increase in each round.
How to Crochet a Perfect Circle – Method #1
This is the traditional and most commonly used method of crocheting a flat circle in spiral using a single crochet stitch. Although this technique is pretty straightforward to follow, the result is not an ideal circle. You will end up with a shape which looks more like a hexagon rather than a circle.
This is because your increases are always on top of each other. I still use this method as a foundation for making different parts of my Amigurumi toys such as heads, arms, legs and bodies. This is because the shape of the circle is not so important; the circle will not stay flat since you will continue to work on it to make it into a body part.
R1: MR – 6 x SC into the ring {6} – watch this step by step video tutorial on How to crochet a magic ring for Amigurumi
R2: INC in each ST around {12}
R3: (SC in next ST, INC) x 6 {18}
R4: (SC in next 2 ST, INC) x 6 {24}
R5: (SC in next 3 ST, INC) x 6 {30}
R6: (SC in next 4 ST, INC) x 6 {36}
R7: (SC in next 5 ST, INC) x 6 {42}
R8: (SC in next 6 ST, INC) x 6 {48}
R9: (SC in next 7 ST, INC) x 6 {54}
R10: (SC in next 8 ST, INC) x 6 {60}

How to Crochet a Perfect Circle – Method #2
This is a method quite a few crocheters recommend in their tutorials so of course I was tempted to test it myself. It is a slight variation on the previous pattern so still quite simple to follow. You need to alternate the placement of the increases in each round so they are not on the top of each other.
The completed circle is somewhat rounder than the previous version but still looking more like a hexagon. I don’t really use this technique on any of my projects as I believe it gives you a pretty similar result as Method #1.
R1: MR – 6 x SC into the ring {6}
R2: INC in each ST around {12}
R3: (SC in next ST, INC) x 6 {18}
R4: (INC, SC in next 2 ST) x 6 {24}
R5: (SC in next 3 ST, INC) x 6 {30}
R6: (INC, SC in next 4 ST) x 6 {36}
R7: (SC in next 5 ST, INC) x 6 {42}
R8: (INC, SC in next 6 ST) x 6 {48}
R9: (SC in next 7 ST, INC) x 6 {54}
R10: (INC, SC in next 8 ST) x 6 {60}

How to Crochet a Perfect Circle – Method #3
This must be my favorite method of crocheting a circle as it gives you a nice round circle. The technique is similar to Method#2 where you alternate your increases so they are not on the top of each other.
However, you take the alternation to the next level as shown in the pattern below. I always use this method when making ears for my crochet animals because they looks so much nicer this way. But you can of course use this pattern as a basis for crocheting all of your Amigurumi toy parts.
R1: MR – 6 x SC into the ring {6}
R2: INC in each ST around {12}
R3: (SC in next ST, INC) x 6 {18}
R4: SC in next ST, INC, (SC in next 2 ST, INC) x 5, SC in next ST {24}
R5: (SC in next 3 ST, INC) x 6 {30}
R6: SC in next 2 ST, INC, (SC in next 4 ST, INC) x 5, SC in next 2 ST {36}
R7: (SC in next 5 ST, INC) x 6 {42}
R8: SC in next 3 ST, INC, (SC in next 6 ST, INC) x 5, SC in next 3 ST {48}
R9: (SC in next 7 ST, INC) x 6 {54}
R10: SC in next 4 ST, INC, (SC in next 8 ST, INC) x 5, SC in next 4 ST {60}

The Best Method to Use
So there you have it! Method#1 is absolutely fine to use for most of your toy parts that will not stay flat. But Method#3 is the one to use if you want to crochet a perfect circle.
If you would like to check out how I use each method in my patterns then go ahead and explore my free Amigurumi patterns. My patterns range from easy patterns for beginners right through to a more advanced level. So you are bound to find some you will love.
They are full of step by step instructions and photos that are easy to follow. And if you prefer to download a printable version of my patterns that are ad free and inexpensive, then visit my Etsy shop.
Did You Find this Tutorial Helpful?
- Leave a comment: share your feedback with us in the comment box below
- Pin this tutorial: pin this tutorial on Pinterest so you can return to it later
- Share this tutorial: show me your love and link to this tutorial on social media
- Subscribe: subscribe to my Newsletter to receive news and updates when I publish new patterns and video tutorials
- Join my Mystery Crochet Along: crochet a mystery Amigurumi toy along with other fellow crocheters for a lot of fun with a ‘surprise’ twist. Sign up for free!
- Explore more: visit my Amigurumi tutorials for more tips and tricks you will love!
Get a 15% discount on all PDF patterns!
Sign up and get a discount on all current and future patterns from my Etsy shop. Plus receive regular updates on latest patterns and video tutorials.
Explore More of My Amigurumi Tutorials
Learn about Amigurumi first before you get started with my crochet toys. Discover the ideal yarn to use, essential tools and helpful tips for reading Amigurumi patterns with confidence.
Find the Perfect Crochet Pattern!
Create beautiful crochet toys with my collection of free Amigurumi crochet patterns. From easy patterns for beginners to more advanced designs, there is something for everyone to enjoy!
Here are just a few patterns you may love. Why don’t you give them a try?!
Free crochet bunny lovey pattern
Happy crocheting!