This post may contain affiliate links, please read my full disclosure policy for more details.
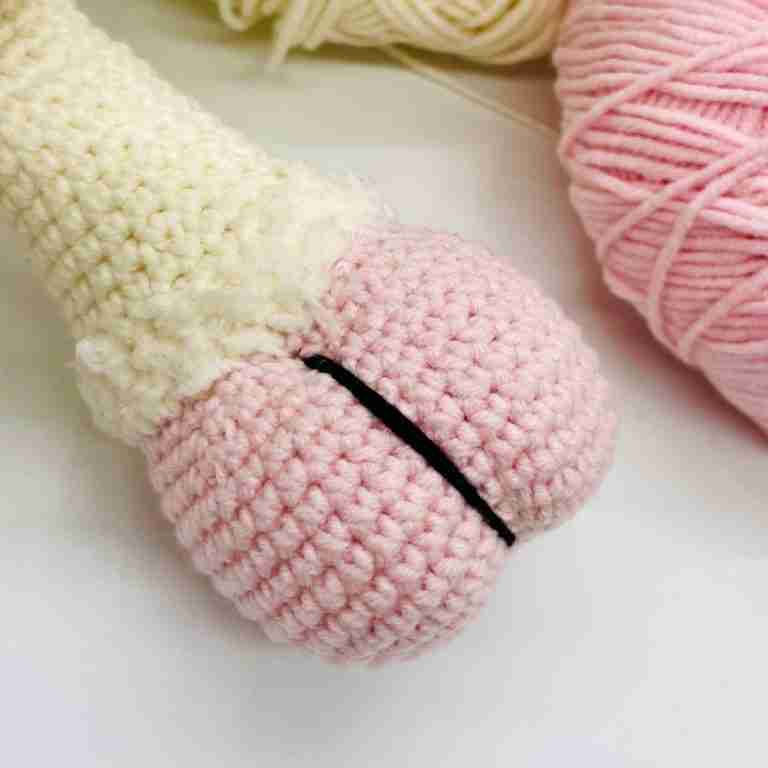
In this video, I am going to show you how to crochet animal nostrils for Amigurumi. This is an easy way how to make nostrils for your crochet animals that even beginners will find easy to follow. I personally like using the surface crochet technique because it’s a simple method of creating nostrils that make your crochet toy look very special.
Scroll down to watch the step by step video tutorial or read more about how to crochet animal nostrils for Amigurumi below.
I used this technique for the below patterns so don’t forget to check them out.

How to Crochet Animal Nostrils for Amigurumi – Abbreviations Used
In this video I use US crochet terminology.
ST: stitch
SL: slip stitch
DC: double crochet stitch
How to Crochet Animal Nostrils for Amigurumi – Written Instructions
– Mark the place where you would like to crochet the nostrils – you can use pins with large heads, stitch markers or a string.
– Insert your hook into first ST (between black and first pink pin)
– Grab your yarn and pull it through the stitch, chain 1xST
– 2xDC in next ST (between first and second pink pin)
– 2xDC in next ST (between second and third pink pin)
– 1xSL in last ST (between third pink and black pin)
– Cut the yarn, pull on the yarn tails tight and weave them in

Join our Cuddly Stitches Community Facebook group to share your creations, chat to fellow Amigurumi makers or to exchange tips and tricks. You can also share feedback and ask for support when working with my patterns.
Watch the Video Here
Did You Find this Tutorial Helpful?
- Leave a comment: share your feedback with us in the comment box below
- Pin this tutorial: pin this tutorial on Pinterest so you can return to it later
- Share this tutorial: show me your love and link to this tutorial on social media
- Subscribe: subscribe to my Newsletter to receive news and updates when I publish new patterns and video tutorials
- Join my Mystery Crochet Along: crochet a mystery Amigurumi toy along with other fellow crocheters for a lot of fun with a ‘surprise’ twist. Sign up for free!
- Explore more: visit my Amigurumi tutorials for more tips and tricks you will love!
Get a 15% discount on all PDF patterns!
Sign up and get a discount on all current and future patterns from my Etsy shop. Plus receive regular updates on latest patterns and video tutorials.
Explore More of My Amigurumi Tutorials
Discover my Amigurumi basics video tutorials, perfect if you want to learn new skills and techniques. Whether you need help with a particular pattern or just looking for helpful tips and tricks, these tutorials are just the thing for you!
Find the Perfect Crochet Pattern!
Create beautiful crochet toys with my collection of free Amigurumi crochet patterns. From easy patterns for beginners to more advanced designs, there is something for everyone to enjoy!
Here are just a few patterns you may love. Why don’t you give them a try?!
Free crochet bunny lovey pattern
Happy crocheting!


